Saturday mornings are when my husband and I run errands together, which means that I am riding in the passenger’s seat instead of driving. When we turned into the driveway this past Saturday I happened to glance up at the front of our house and noticed how absolutely awful my front flower pots looked.
They had been so striking during the summer with the Persian Shield, Angelonia and Ice plants spilling over the edges and down the sides. When they started looking a little tired and worn, I immediately replaced them with gorgeous mums that I had bought at an Amish farm in the area. They were beautifully grown — dark green foliage, perfect shape and tight buds that slowly opened over several weeks. My neighbors and I all enjoyed them; they gave off such a cheerful vibe!

The perfect shape and color of the bronze mums brightened a somewhat dreary fall.
And then we had several days of hard frost right in a row and the golden flowers turned brown and limp. I have to admit that I got busy and they were easy to ignore; there was just no motivation to take care of them. When we pulled up to the driveway on Saturday and I saw them from the street view, it hit me that the half dead pots flanking the front of my house were making the entire front yard look sad. I needed to do something about it.
Usually I just remove them from sight. I talk someone (realistically, it’s my husband who winds up moving them) into helping me carry them to my potting bench where they stay over the winter. They are huge, heavy pots and moving them back and forth is no picnic. This year, in the hopes of saving our backs and improving our landscape, I am determined to try something new. I’m going to fill them with winter decorations that can add color and interest to my front landscape for the next few months.

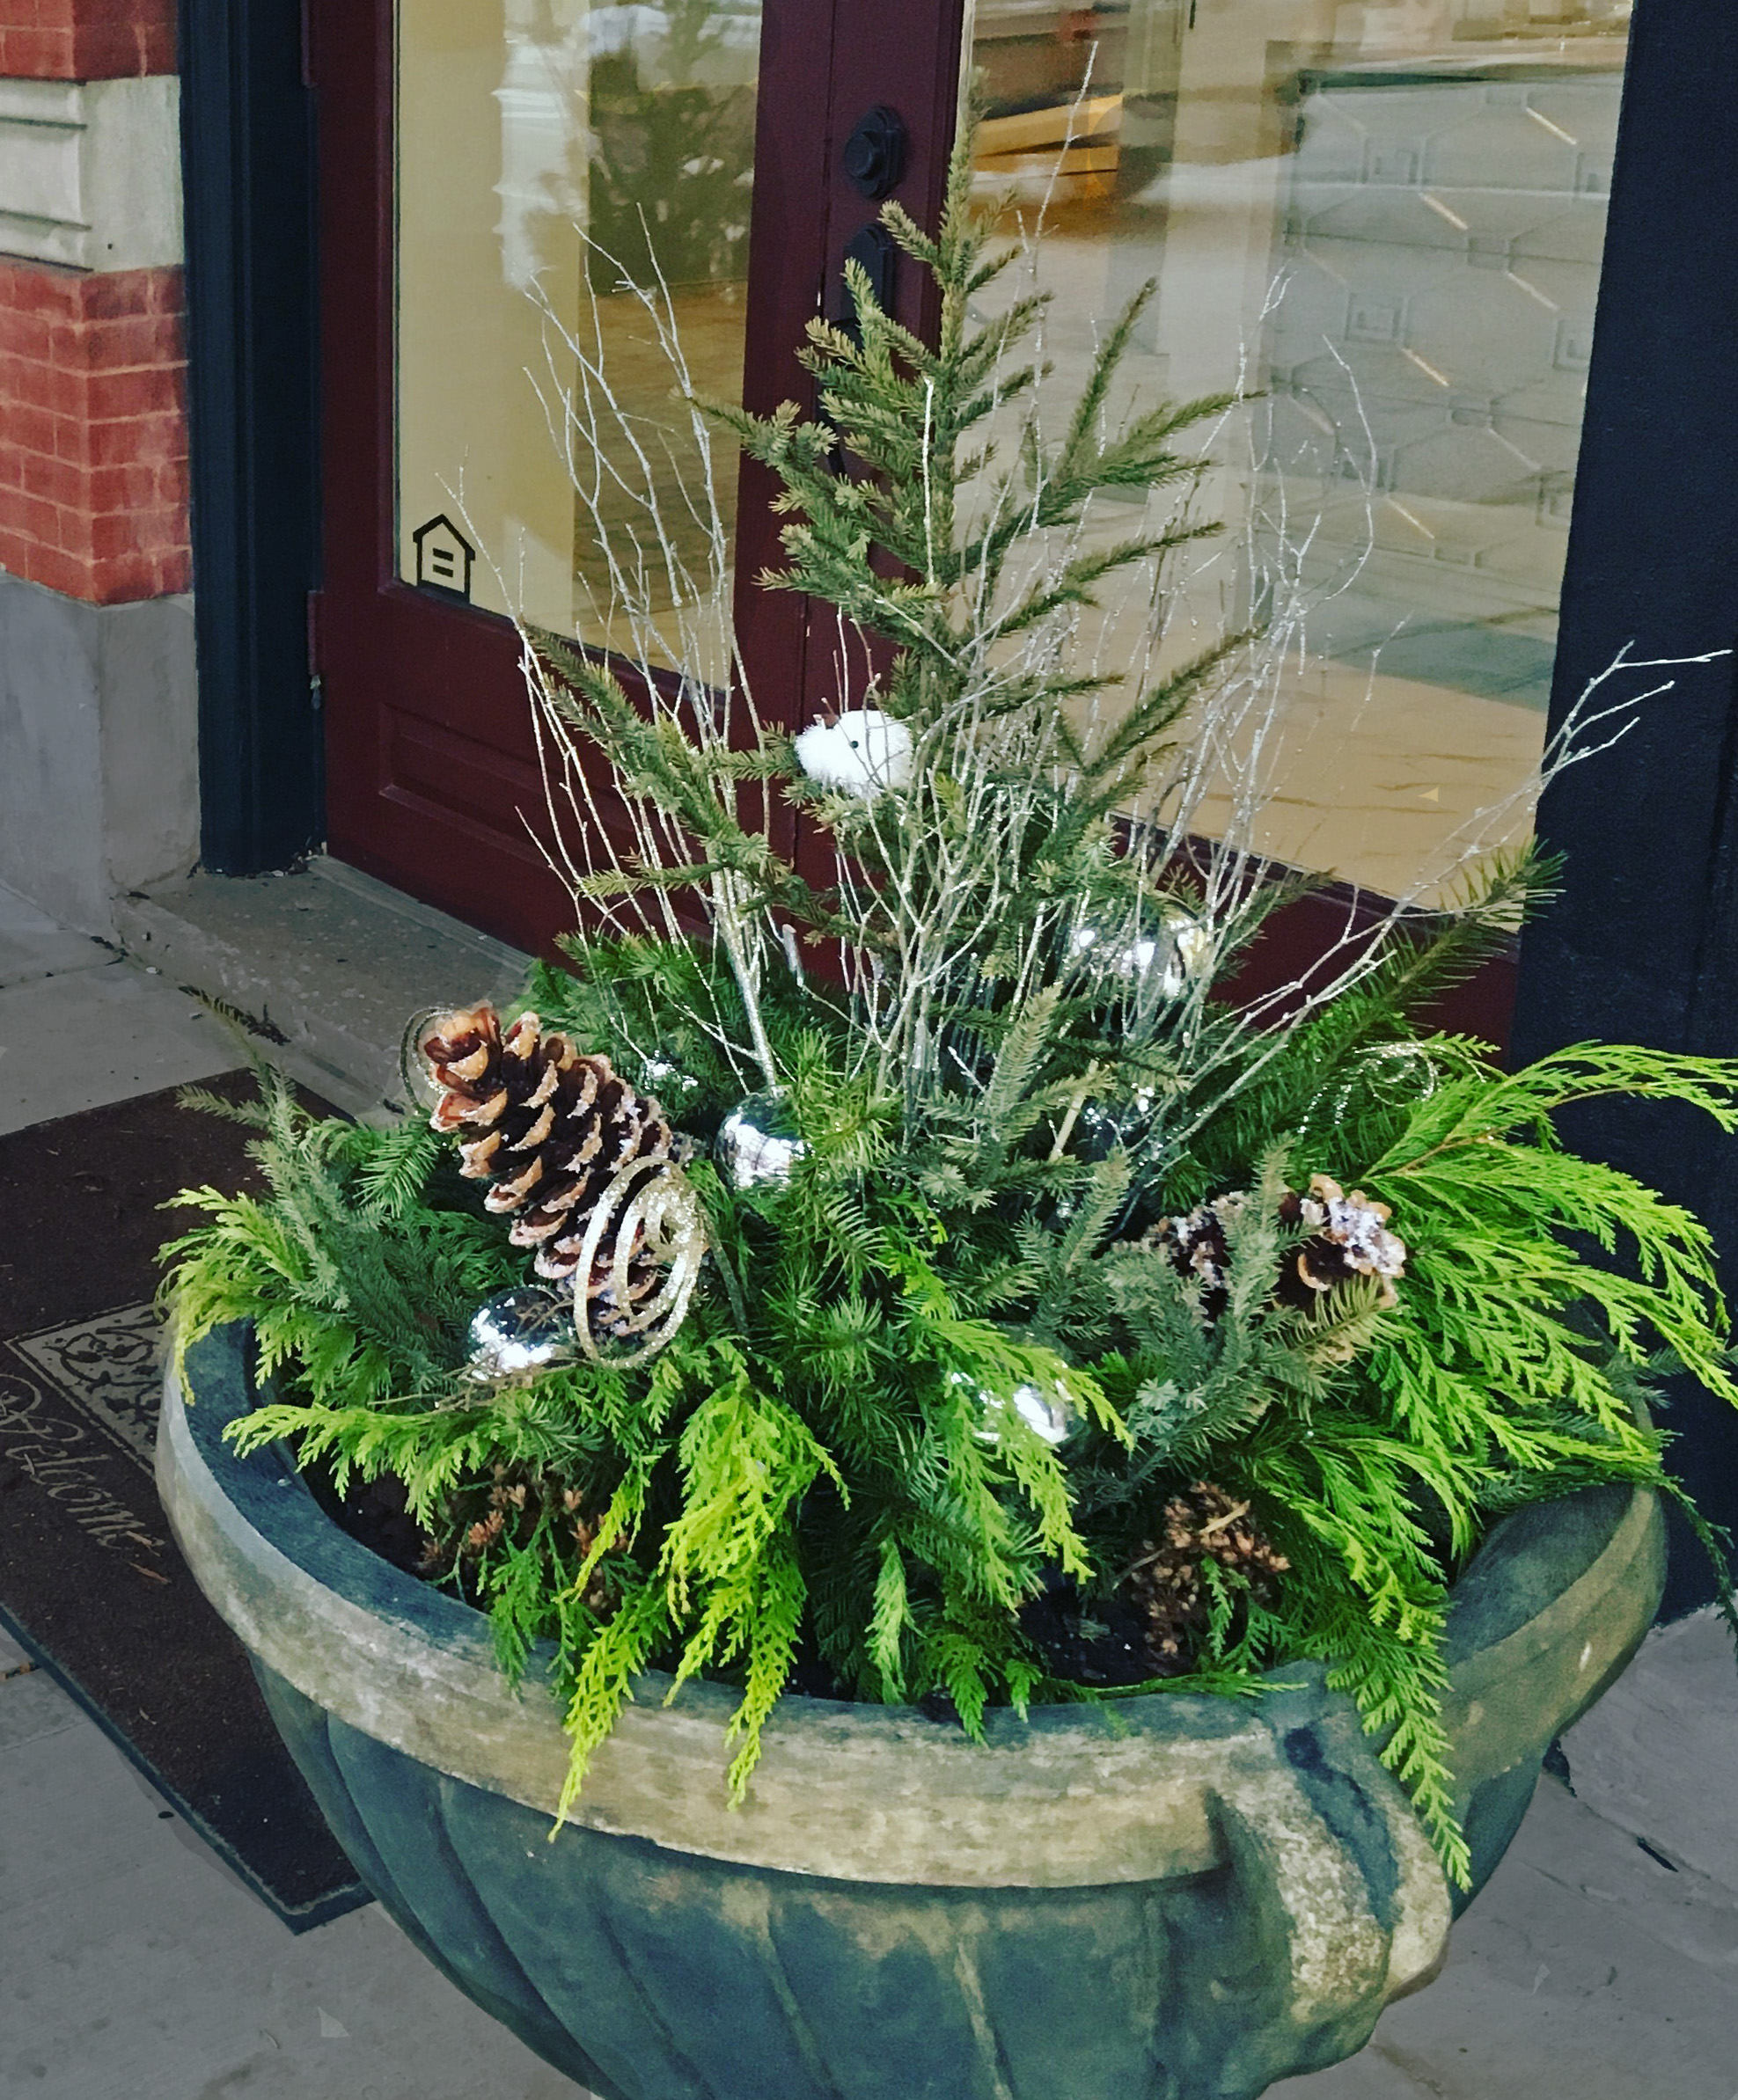
All sorts of natural materials can be used in creating outdoor winter pots.
Because I’ve never arranged winter pots before, I talked to Sandy and Jo Ann, two of the very talented and artistic staff at Embassy. I’m going to take some cues from them since they have been creating winter beauty at various commercial and residential locations in the Kansas City area for over ten years. Sandy and Jo Ann were happy to share their expertise.
Creating spring and summer pots means a trip or two through the garden center to find the perfect combination of plants with just the right colors and shapes. Collecting the materials to build a winter pot however, can require a bit more creativity. Winter pots tend to use less live plant material, although evergreen trees and shrubs can remain attractive throughout the winter if they are hardy enough and receive proper care. Remember that a pot is actually two zones colder than the actual zone. According to Sandy, “Deciduous perennials that have winter interest such as interesting seedpods can be used, as well as grasses with beautiful plumes (seeds). Ornamental grasses have wonderful winter interest.” Jo Ann recommends pines, boxwood, spruce and holly for winter pots. Among her favorite accent pieces are pine cones, berries, sticks and lights. She also suggests red and yellow twigged dogwoods for attractive accents in winter pots. Both designers emphasize the use of natural materials, but add that almost anything can be incorporated if it can withstand the elements. To them, the possibilities are endless.
To actually begin designing a pot, decide on the focus and preferred style. Consider the architecture and color scheme of your house. What will complement it? Do you prefer a modern, sleek design or do you lean towards the more traditional? Do you like colors that coordinate or those that set each other off by contrast? Once those ideas are set, then it is time to select materials and create the pot.
Jo Ann and Sandy follow the thriller, filler, spiller pattern of design. A thriller is a tall, striking piece for the center or backdrop of the design. It brings the eye to the piece. The filler is a medium piece surrounding the thriller and the spiller is something low that spills over the sides. The three work together to lead the eye throughout the entire work.

The design elements of thriller, filler and spiller are perfectly illustrated in this pot. Design by Sandy DeFoe.
As we talked, the two designers shared another “trade secret” with me. They shared that evergreen boughs, which typically dry out and look scraggly by January, can be kept just a little longer if you cut the ends on a diagonal and bury the cut ends into the soil. Keep them well watered and they will stay fresher looking.
Their final piece of advice though, was the best one: Have fun and create something that YOU like.
It’s time to start planning for your winter pots. Let the designers at Embassy help you create your ideal decorations.
Winter pots designed and installed by Embassy Landscape.